Showing posts with label themed party. Show all posts

Friday, July 8, 2016

Twinkle Twinkle Little Star Baby Shower

|intro|

I had the honor of helping host a baby shower for our close friends. She was having a little princess and wanted to have a classy and simple theme.  Twinkle Twinkle Little Star theme was the perfect fit!


|DIY Twinkle Twinkle Little Star board decor background by me|

|cake topper from Paper & Parties Co.|

|stitched treat bags by Sunshinebelinda's Blog|

|DIY treat sign by me|
|3D gold star table decor by me|


|cookies by Korino Sweets|

|chocolate pretzel rods by Anna|

|cake pops by me|

|french macarons by Oui Desserts|
|DIY dessert table risers by me|

|cotton candy ice cream cones by Jenny|

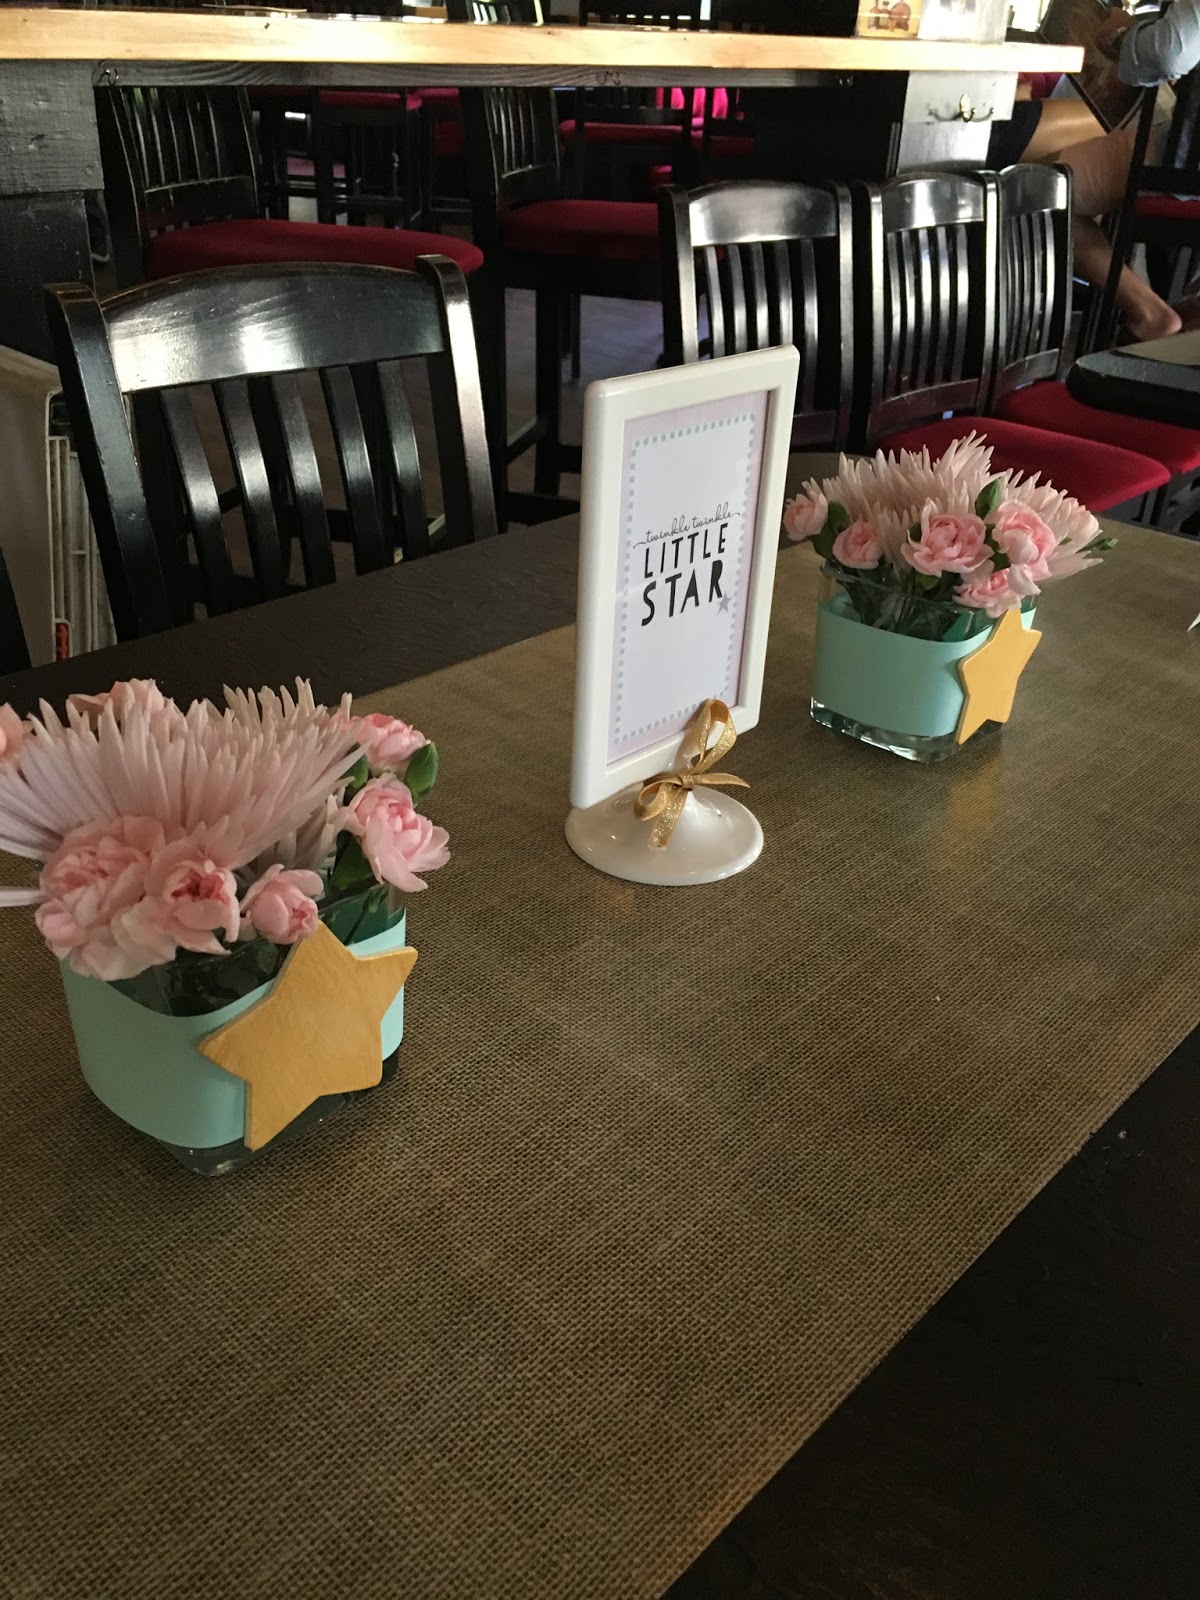
|DIY table signs by me|
|DIY floral arrangements by me|

|DIY mom to be corsage by me|

|gift table|

|DIY Wishes for Ava sign in by me|
|DIY table sign by me|

|fabric banner by Sunshinebelinda's Blog|

|decorative wooden block letters by Sunshinebelinda's Blog|

|DIY star themed diaper cake by me|


Saturday, February 6, 2016

Mickey Mouse Clubhouse DIY Party Ideas

|intro|

Matty is a huge fan of the show Mickey Mouse Clubhouse.  So it was only fitting that it was his theme for his first birthday.  There were so many ideas that could be centered around this theme.  I made about 90% of everything, it was time consuming but very worth it.  Below are a few things I DIY'ed.  I think everything came out great!  


|DIY Mickey Mouse Monthly Milestone Banner|


|DIY Mickey Mouse Clubhouse Favor Tags|


|DIY Mickey Mouse Dessert Table Backdrop|
|DIY Mickey Mouse Birthday Banner|


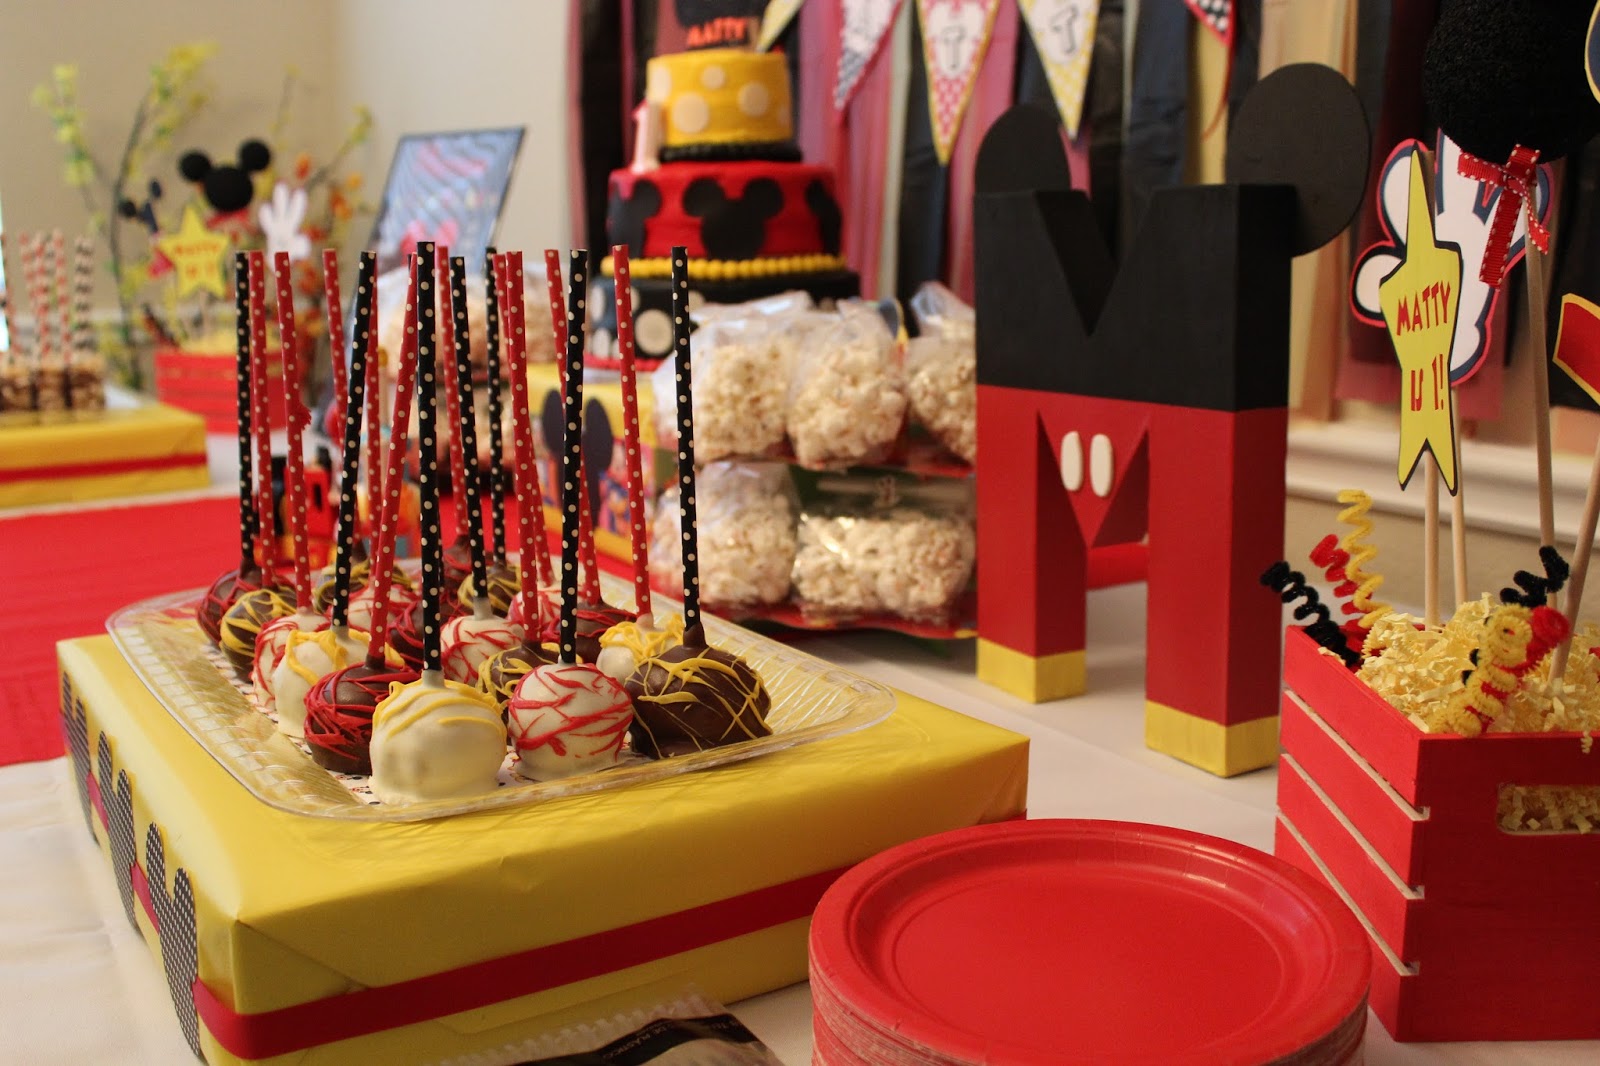
|DIY Mickey Mouse Food Risers|
|DIY Mickey Mouse Clubehouse Birthday Milestone Poster|
|DIY Rice Krispies Treat Pops|
|DIY Funfetti Popcorn Favors|


|DIY Cake Pops|
|DIY Mickey Mouse Initial Letter|


|DIY Mickey Mouse Theme Table Centerpiece|


|DIY Mickey Mouse Photo Booth Frame|
|DIY Picture Head Photo Prop|


|DIY Mickey Mouse High Chair Banner|
|DIY Mickey Mouse Birthday Headband|


|DIY Mickey Mouse Cake Topper|


Thursday, October 24, 2013

Baby Oh Baby...Domesticated Diva's First Attempt at Making a Diaper Cake

Oh boy, baby fever is among us!  A couple who are very close to us are having a baby, and for part of the baby shower I decided to make a diaper cake.  It was a police themed baby shower, which made it a bit tricky on tying in the theme to the diaper cake.  Here's the final product...


|what you will need|

- I used two packs of diapers (one pack was size 2 and the other was a size 3)
-70 rubber bands (small and larger/longer ones...you will need a little extra because some will snap)
-baby/themed decor (artificial flowers, ribbon, stickers, wooden decoration, baby blocks, stuffed animals, baby toys, etc)
-empty paper towel roll
-a small craft foam cone/cylinder for the third layer
-white foam page
-thin wooden dowel
-double sided tape and glue gun

|how to|

{1} I planned to make a three tiered diaper cake, because it had more of a wow factor.  To make a three tiered cake, you will need two full packages of diapers.  I rolled the diapers semi-tightly and tied/wrapped a rubber band around it.  Wrap the diaper from top (open end) to bottom (where the baby does #1 and #2 lol).


{2} Start wrapping the diapers around the empty paper towel roll using the larger rubber bands.  Stop once you achieve your desired thickness.


{3} Repeat step {2} for the other two layers.  For the third (top) tier stick the foam cone upside down into the opening of the empty paper towel roll.


{4} Now the fun part...decorating!  I used a mixture of toy badges, ribbons, letter stickers, wooden decorative shapes, flowers, printed/decorative paper, and design elements I created myself. 


-my rough draft design sketch-

{5} I made the "POLICE LINE DO NOT CROSS" banner using letter stickers and yellow ribbon.  I also made two of the decorative signs used in the cake topper ("Baby M Reporting for Duty" and the Baby Police ID Card.  For the decorative signs, I printed it on regular printer paper.  I then used double sided tape to stick the sign onto the white foam page.  I cut the sign using scissors.  I then hot glued the wooden dowel onto the back of the sign. 

-"POLICE LINE DO NOT CROSS" Sign-

-Police Badge "Baby M Reporting for Duty"-

-Baby M Police ID-

{6} Cut the flower from the stem using a floral wire cutter.  Stick the flower in the foam cylinder.  Then, stick the wooden signs and decorative signs in either the foam or in between the diapers (whichever seems more secure). 

-Diaper Cake Topper-


Thursday, May 16, 2013

Themed Bridal Shower...Eat, PINK, and Be Married

Have I told all of you that I absolutely love themed party!?!  I seriously might have an issue.  I attended a cute "Eat, PINK, and Be Married" bridal shower for a good friend of mine.  Her bridesmaids did an awesome job putting everything together from the food, decor, to the games.  Here are a couple pictures from the shower.
The amazing food provided by Central Market and the bridesmaids
How freaking stunning is this?!?


Hello Kitty Cookie Favors, Pink Colored Drinks, Cotton Candy Martinis, Yummy Sweets

I was able to contribute by doing the "Future Mrs." Banner and the table signs.

I bought all my supplies for the banner from Hobby Lobby.  I chose two patterns of paper.  One 12"x12" sheet is enough for one triangle bunt piece.  I followed Paper Bunting Youtube Tutorial. 

Here's some of the supplies I used...


First, I folded the paper in half.  Then, I marked where the seam in the middle was with a pencil.


Then, I did a diagonal fold that connected the pencil mark in the middle with the corner of the paper.


Then, all you have to do is cut along the seam.  I didn't do a double sided print like the video, because I thought the paper I used was thick enough and to save on time.


I then glued the letters onto the banner.  I created the letters on Microsoft Publisher and cut them out by hand.  Then, I punched holes at the corner ends on top and strung ribbon through.  Make sure the ribbon is slightly thicker than the hole, so the banner pieces will stay in place.


The Final Product

I also made three table signs (Keep Calm and Marry On, Pretty in Pink, and Lucky in Love).  I designed them on Microsoft Publisher, and they were put in the IKEA Tolsby frames.  I love those darn frames!


Fab pro pictures shot by my fellow blogger A June Affair. Check her site out!

                                       
                                                   Picture Courtesy of A June Affair