Showing posts with label wedding. Show all posts

Thursday, August 1, 2013

Home Sweet Home: DIY Picture Wall Collage

Our front entry way was lacking some pazazz.  I mean one can only stare at a bare wall for so long.  We received quite a few picture frames from my mommy-in-law, and I really wanted to utilize them in that space.  I also thought it was time to hang up some of our wedding and engagement pictures.  I found this genius way of hanging pictures on Pinterest.  Pinterest seriously has the answers to all of life's questions.


Picture found on Pinterest

It is really genius, because it is so simple.

All you need is:
-A Roll of Brown Craft Paper (you usually can find this where the gift wrapping paper is)
-Painter's Tape
-Pencil
-Hammer
-Picture Hanging Hardware (you can find a cheap pack of them at Home Depot)
-Picture Frames, Wall Letters, Wall Decor, etc.

Some tips for choosing frames and wall decor:
-Use the same color scheme (I used black frames.)
-Choose unique wall decor elements like initial letters, inspirational quote wall art, small mirrors, small decorative elements, etc.)  I found Hobby Lobby had a lot of neat wall decor and at great prices.
-Space your frames and wall decor evenly.  I find spacing them closer together gave them a finished look. DON'T SPACE THEM TOO FAR APART.
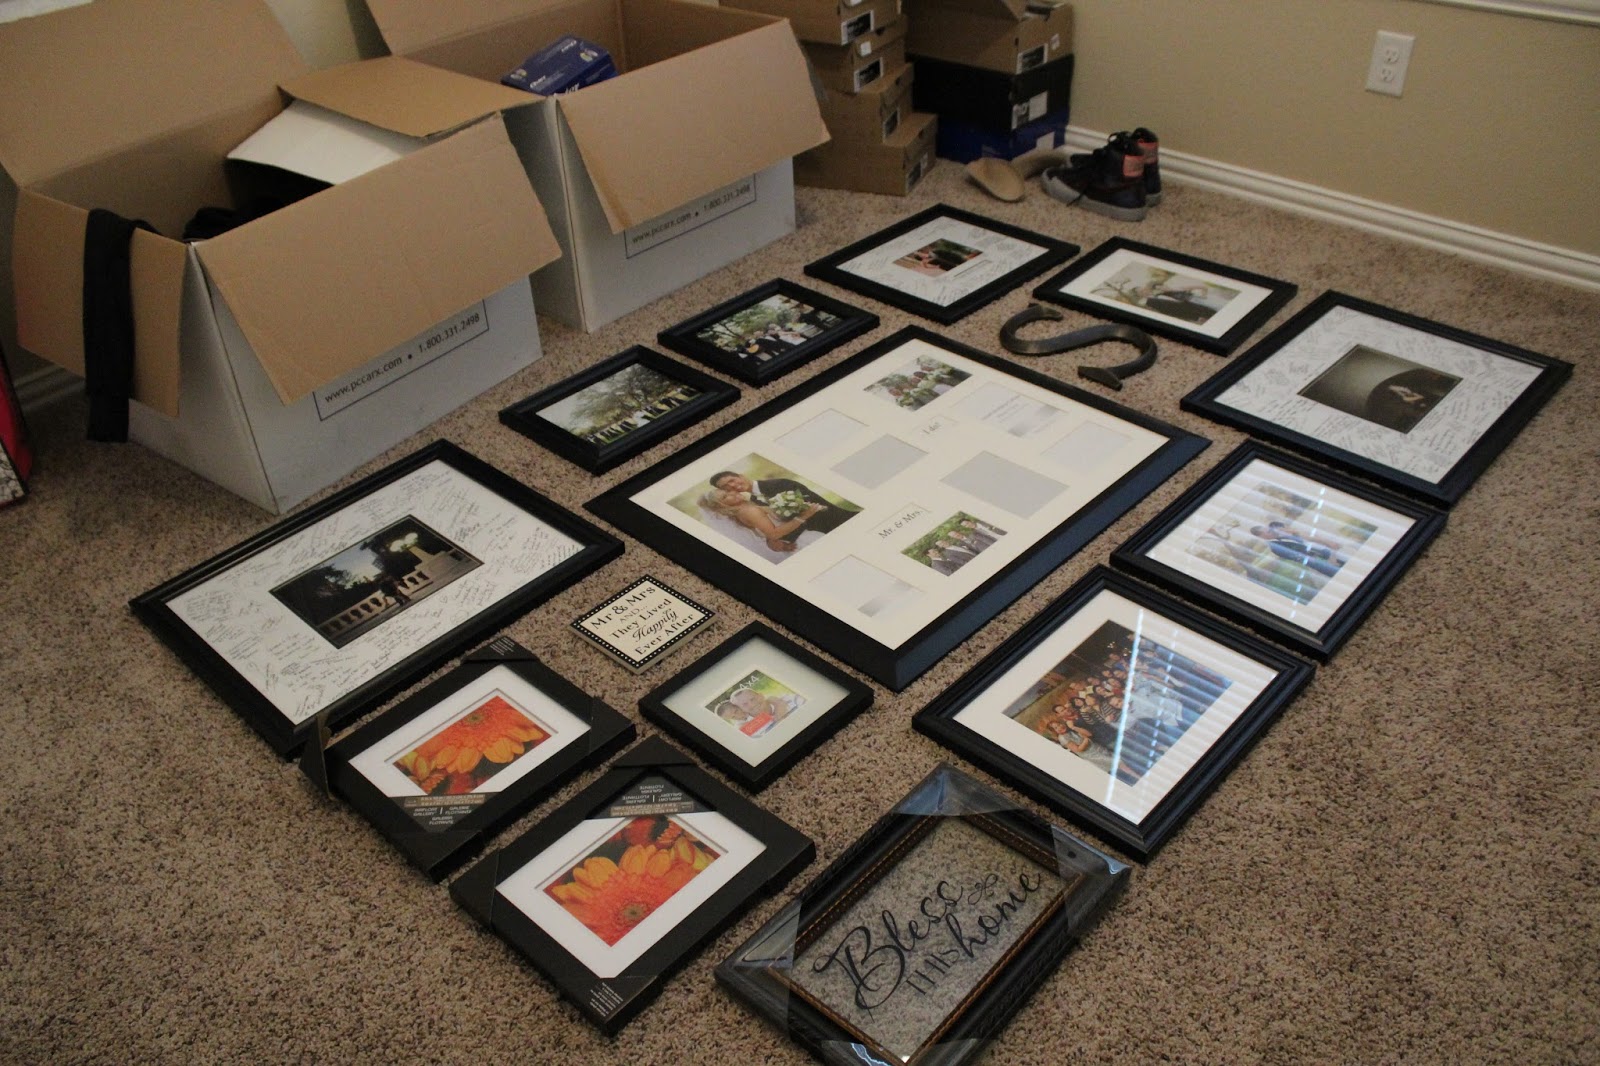
-Play around with the collage arrangement on the floor.  Make sure you move the items around until you get the look you want. 
-Make sure your arrangement has some sort of symmetry.  I had a center frame as a focal point and worked my way out.  You can also form a square/rectangle with your frames to make it more appealing.

Step 1: Trace your frames and wall decor on the brown craft paper with a pencil.  Then cut along the outline. Write which picture or wall decor on the front side of the craft paper.  That way when you tape the craft paper to the wall you know which frame goes there.  For instance, for the below frame I wrote "Bless This Home Frame" on the front of the craft paper cut out.


Step 2: Flip the picture frame or wall decor, so the backside is facing up.  Find where the nail should be on the hook.  Make sure it's centered and poke a hole through the craft paper.  Now do this to the rest of the frames and wall decor.


Step 3: Figure out your wall collage arrangement.  This took me awhile to figure out, but I eventually came up with this.  I then took a picture of the arrangement, just to make sure I was placing the frame or wall decor in the right place on the wall.
 
Step 4: Tape the cut outs to the desired wall.  I just taped the corners of the cut outs, so you don't have to waste more tape than you need to.


Step 5: Hammer in the picture hanging hardware into the holes you made earlier.  Carefully, peel away the craft paper and hang your frames and wall decor. 


I did not have to redo any of the holes I made, because this technique is so accurate.  This does take a little more time, but as you can see the extra work really does pay off.


Thursday, May 16, 2013

Themed Bridal Shower...Eat, PINK, and Be Married

Have I told all of you that I absolutely love themed party!?!  I seriously might have an issue.  I attended a cute "Eat, PINK, and Be Married" bridal shower for a good friend of mine.  Her bridesmaids did an awesome job putting everything together from the food, decor, to the games.  Here are a couple pictures from the shower.
The amazing food provided by Central Market and the bridesmaids
How freaking stunning is this?!?


Hello Kitty Cookie Favors, Pink Colored Drinks, Cotton Candy Martinis, Yummy Sweets

I was able to contribute by doing the "Future Mrs." Banner and the table signs.

I bought all my supplies for the banner from Hobby Lobby.  I chose two patterns of paper.  One 12"x12" sheet is enough for one triangle bunt piece.  I followed Paper Bunting Youtube Tutorial. 

Here's some of the supplies I used...


First, I folded the paper in half.  Then, I marked where the seam in the middle was with a pencil.


Then, I did a diagonal fold that connected the pencil mark in the middle with the corner of the paper.


Then, all you have to do is cut along the seam.  I didn't do a double sided print like the video, because I thought the paper I used was thick enough and to save on time.


I then glued the letters onto the banner.  I created the letters on Microsoft Publisher and cut them out by hand.  Then, I punched holes at the corner ends on top and strung ribbon through.  Make sure the ribbon is slightly thicker than the hole, so the banner pieces will stay in place.


The Final Product

I also made three table signs (Keep Calm and Marry On, Pretty in Pink, and Lucky in Love).  I designed them on Microsoft Publisher, and they were put in the IKEA Tolsby frames.  I love those darn frames!


Fab pro pictures shot by my fellow blogger A June Affair. Check her site out!

                                       
                                                   Picture Courtesy of A June Affair


Thursday, April 11, 2013

Mr. and Mrs. Little Domesticated Sister's Invite

After a long awaited day, my little sister is finally hitched!  It was such a wonderful event/weekend!  I couldn't be happier for them.  I have been DYING to show off her wedding invitations, which I helped in designing :)

Here they are...

Most of the print material was sourced from Cards and Pockets.  Their prices and selection are great!  My sister used a local print shop in San Antonio to print off the invitations.

My little sissy hand addressed each envelope.  She used a metallic pen and did an amazing job! 

I absolutely loved how they turned out.  I got inspiration from Etsy and Pinterest :)  I hope you enjoyed them!

Thursday, February 14, 2013

Little Sissy's Kentucky Derby Bridal Shower

This past weekend we had my little sister's bridal shower.  I couldn't be more excited since it was a themed shower, and we all know that Domesticated Diva loves her themed parties!  The theme for her shower was Kentucky Derby.  The ladies did not disappoint and dressed in their fabulous dresses and their over the top big derby hats! 

The bride to be with some of her bridesmaids

Here is a recap of some of the crafty creations me and her bridesmaids made for the shower...

I designed, printed, and cut the invitations myself. I bought the paper and envelopes at Hobby Lobby.
Kentucky Derby Shower Invites made by Domesticated Diva
 I also made the M moss initial and mini derby hats that went on the sign in table.  To make the moss initial sign, you will need a pack of reindeer moss, a low heat glue gun, initial (I found mine at Hobby Lobby), brush/sponge brush, foam square board (12" x 12"), and craft paint.  I first painted the initial.  This required two coats of silver paint.  Make sure the initial dries between coats.  Then, I glued the initial to the foam square.  Once dry, I began filling in the foam square with the reindeer moss.  A thin layer is fine.  I then went back and filled in any missing spots.  Once the square was covered with moss, I trimmed along the initial so you can easily read the letter. 
"M" Moss Initial Sign
I also made mini derby hats.  I found these adorable mini hats (at the doll section of Hobby Lobby for $1).  I jazzed it up with a little glue gun, ribbon, flowers, and embellishments. 

Mini Derby Hats

Here's the Moss Initial Sign and Mini Derby Hats on the sign-in table at the restaurant...


I made a total of three derby hats (one for myself, one for my step mom, and one for the bride-to-be).  I used wired ribbon, glue gun, floral wire, fake flowers, charms, feathers, tulle, and organza.  I got ideas from Dee's Crafts.  They are from Kentucky and have everything you need to make derby hats.  They also have a Youtube channel.


Domesticated Diva's Derby Hat

The Bride to Be's "Happily Ever After" Derby Hat

My Step mom's Derby Hat

I also made a bunting banner.  I bought a ready-to-decorate banner from Hobby Lobby.  All I had to do was decorate it with craft letters, ribbon, and paper.

"Congrats Mel" Banner


The Banner at the Bridal Shower

I also created the centerpieces.  I bought the glass vases from the Dollar Tree and the white frames are from Ikea.  I wrapped the square glass vase with ribbon and the cylinder vase with craft paper and raffia.  I designed the "Keep Calm and Derby On" and "Lucky in Love" signs using Microsoft Publisher.  I bought fresh flowers the day of the shower and floating tea lights.


"Lucky In Love" Centerpiece

"Keep Calm and Derby On" Centerpiece


For the sign in table, one of my sister's bridesmaids created a "Date Night" Sign In.  People write in their favorite date night idea on a craft stick for the couple.  The idea is for them to randomly choose a date night idea from the jar to find unique ways to spend time together.


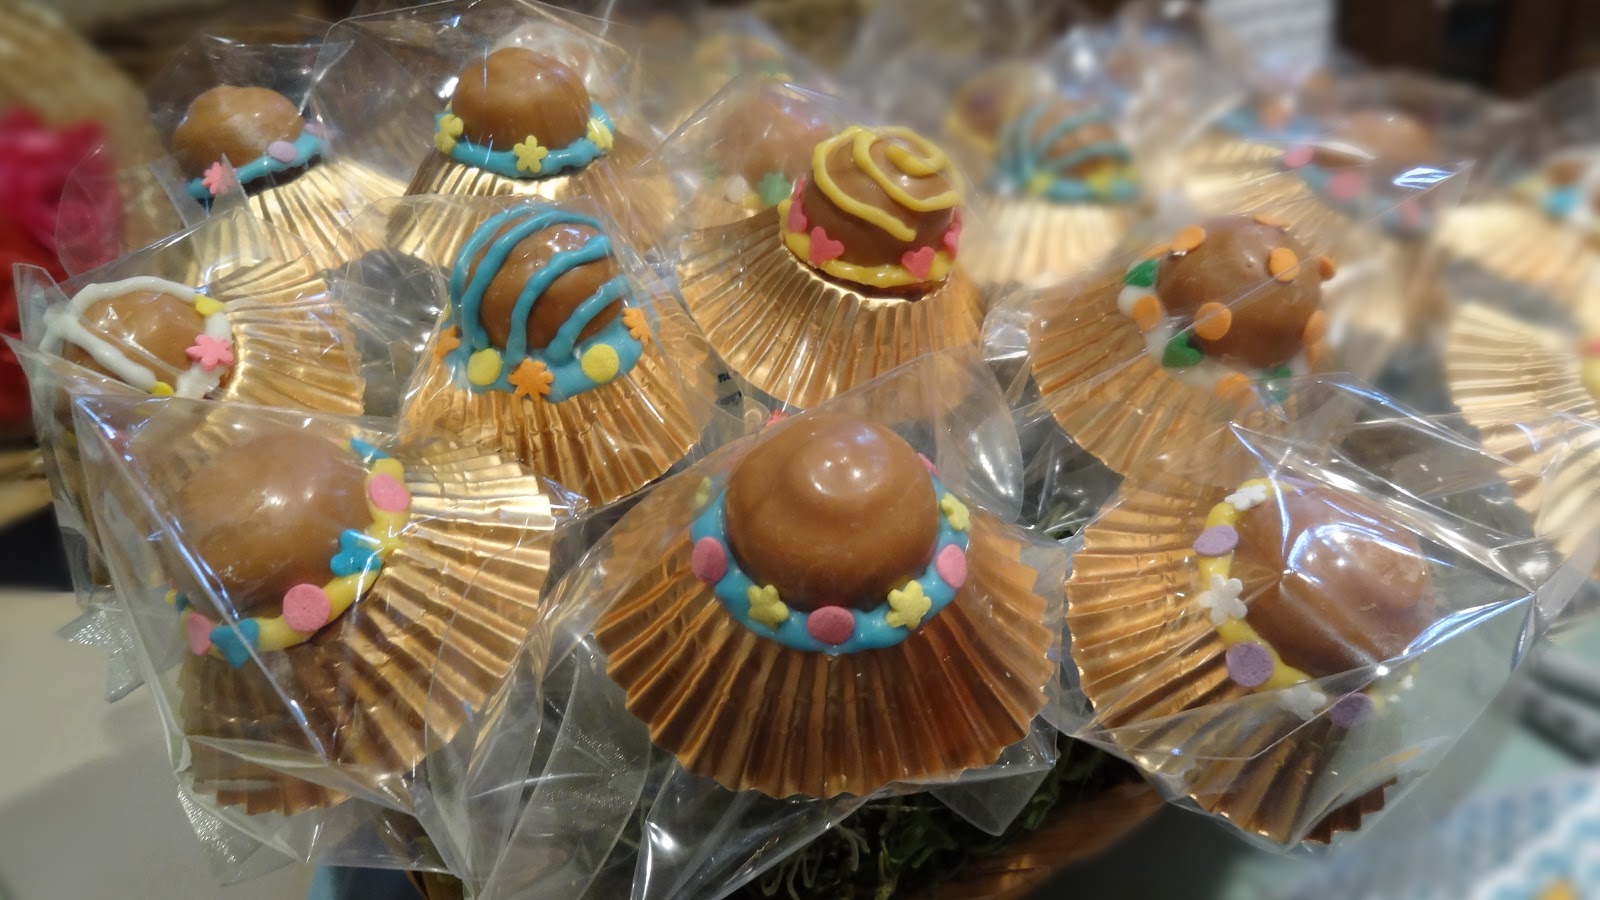
My sister's Maid of Honor also made Peanut Butter Kentucky Derby Pops in the shape of derby hats!  These were the shower favors for the guest.


We also made the shower prizes for the games. One was a wine tag for a Apple Flavored Wine, and the other prizes were gift baskets containing wine glasses, mini wine bottle, and chocolates.


Here are some pictures from the shower:

The Southern Belles with their Hats


The Ladies Enjoying their Lunch


The Beautiful Sign In Table


The Cute Derby Cake made by Alamo Sweets in San Antonio


The Bride to Be Cutting Her Derby Cake

Tuesday, October 23, 2012

Love and Marriage...DIY Photo on Canvas Anniversary Gift

Tradition has it that you are suppose to give a "paper gift" for your first anniversary.  See Anniversary Symbols and Meanings.  This is suppose to symbolize the strength in paper that comes from the interlaced connection of the paper's individual threads. So, I wanted to incorporate paper into my DIY gift.

Here's what I came up with...


All you need is:
-4" x 4" canvas (Quantity 2)
-Mod Podge
-Ribbon
-Pictures printed on heavy wt paper (at least 90 lb card stock)
-E6000 Glue (or another type of heavy duty glue)
-Paper Cutter
-Disposable Paint Sponge or Brush


Print your picture and design on your paper.  I design these at a dimension of 3.8" x 3.8" so that there was no overlap on the canvas.  Cut your paper using your paper cutter.


Apply a layer of Mod Podge to the canvas.  While the canvas is still wet, center your picture onto the canvas.  Apply pressure and smooth out any bumps or bubbles that may form.  Allow this to dry for about an hour.

After the canvas is pretty dry apply another coat of Mod Podge on top of the picture to seal it on the canvas.  Allow the canvas to dry again for about an hour.  Then apply a second top coat, and allow it to dry completely overnight.

Then, turn the canvas over onto it's backside and apply the E-6000 glue to the back where you want to place the ribbon.  Apply pressure to the ribbon where the glue is to ensure it sticks.  I looped the ribbon on the top, so there would be a place to hide the thumb tack when you hang it on your wall or cubicle.

Here's the final product...


Domesticated Diva Cost:

Blank Canvas: $1.80 (originally $2.99 but 40% off) = $3.60 for two)
Mod Podge, Ribbon, Paper Cutter, Paint Brush, E-6000 Glue, and Paper: FREE (already had)

Total Cost of Project: $3.60