Tuesday, October 23, 2012

Love and Marriage...DIY Photo on Canvas Anniversary Gift

Tradition has it that you are suppose to give a "paper gift" for your first anniversary.  See Anniversary Symbols and Meanings.  This is suppose to symbolize the strength in paper that comes from the interlaced connection of the paper's individual threads. So, I wanted to incorporate paper into my DIY gift.

Here's what I came up with...


All you need is:
-4" x 4" canvas (Quantity 2)
-Mod Podge
-Ribbon
-Pictures printed on heavy wt paper (at least 90 lb card stock)
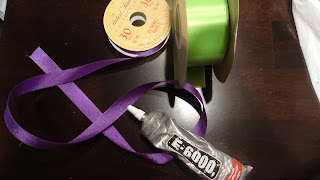
-E6000 Glue (or another type of heavy duty glue)
-Paper Cutter
-Disposable Paint Sponge or Brush


Print your picture and design on your paper.  I design these at a dimension of 3.8" x 3.8" so that there was no overlap on the canvas.  Cut your paper using your paper cutter.


Apply a layer of Mod Podge to the canvas.  While the canvas is still wet, center your picture onto the canvas.  Apply pressure and smooth out any bumps or bubbles that may form.  Allow this to dry for about an hour.

After the canvas is pretty dry apply another coat of Mod Podge on top of the picture to seal it on the canvas.  Allow the canvas to dry again for about an hour.  Then apply a second top coat, and allow it to dry completely overnight.

Then, turn the canvas over onto it's backside and apply the E-6000 glue to the back where you want to place the ribbon.  Apply pressure to the ribbon where the glue is to ensure it sticks.  I looped the ribbon on the top, so there would be a place to hide the thumb tack when you hang it on your wall or cubicle.

Here's the final product...


Domesticated Diva Cost:

Blank Canvas: $1.80 (originally $2.99 but 40% off) = $3.60 for two)
Mod Podge, Ribbon, Paper Cutter, Paint Brush, E-6000 Glue, and Paper: FREE (already had)

Total Cost of Project: $3.60

Friday, October 19, 2012

DIY Chic Holla-ween Nails...Black and Gold Glitter French Manicure

So nail art and design is really big right now.  Just check out Pinterest; it is flooded with different ideas.  Well my sis and I did a little DIY nail session, and I created this black and gold design.


All you need is...
-Metallic Gold Nail Polish
-Base Coat Polish
-Top Coat Polish
-Black Glitter (found at craft stores)
-Scotch Tape


First, apply a base coat to all your nails.  Allow your nails to dry completely.

Then, paint a coat of gold nail polish on all nails.  Allow your nails to dry completely again.

After nails have dried, place a small amount of tape across the nail about 2 mm from the top.  Make sure the tape is securely stuck to the nail to ensure a clean and straight french tip.  This will act like as your french manicure guide.


Apply a thick coat of gold nail polish to the upper part that is exposed.  Immediately after applying the nail polish sprinkle a generous amount of black glitter to the area of the nail that is wet.  I did one nail at a time so I didn't feel rushed.  Gently tap the glitter to ensure it adheres to the nail.


Then, carefully peel the tape off your nails. Ta-da!


Let your nail dry completely, which takes about 30-45 min.

Then, apply two coats of top coat.  Make sure you let your nails dry completely between coats.  That's all it takes to making this festive nail design!

Sissy and I browsing Pinterest for ideas

Friday, October 5, 2012

Champagne Wishes and Caviar Dreams... DIY Caviar Manicure

So, the Ciate Caviar Manicure Set at Sephora caught my eye.  How fab is this...


But at $25, I wasn't willing to commit.  So I found that you can do caviar manicures yourself. 

Here's what I used...

-Clear Microbeads (found in the scrapbook section at Michael's...I choose clear beads because you can use them with almost any nail color)
-Clear Top Coat Paint
-Nail Color of your choice (I prefer black, soft pinks, grays, opaque colors)
-Plate to catch the microbeads (I would actually use a deeper bowl in the future, since these beads get everywhere)

The steps are fairly easy peasy!

I used fast drying nail polish, because I am impatient lol. 

1.)  Apply a thin first coat.  Allow to dry completely.

2.)  Apply a much thicker coat of nail polish and immediately sprinkle the beads on your nail over the bowl or plate to catch the beads.  Gently tap the beads that stick to your nail to ensure they stay secure.  Then sprinkle the microbeads again on areas where the beads did not stick and gently tap those in.  ***I actually did one nail at a time for this step and not the whole hand.  It was much easier, and I was able to take my time with each nail.***  Allow the nails to dry completely.  I waited 10 minutes, since I used fast drying nail polish.

3.) Then apply a thick clear top coat over the entire nail ensuring all the nooks and crannies are covered.  Allow to dry for about 30-45 min.

That's it!

The beads actually stay on pretty well.  I think it should last at least 3-5 days.

Here's the final product...


Domesticated Diva Cost Breakdown:

Clear Microbeads: $4.99 but with 40% coupon = $2.40
Nail Polish and Top Coat: FREE (already had)

TOTAL: $2.40 (and there's plenty of microbeads leftover to do this at least 15 times)