Tuesday, November 25, 2014

San Francisco Style Garlic Fries

For our yearly trip, Mr. Domesticated Diva and I decided to go to San Francisco!  We had a great time, we especially enjoyed all the wonderful food.  We heard so much about the SF famous garlic fries, but never had a chance to try them.  Even though we never had it in San Francisco, we were able to recreate them at home!

 
|what you need|
 
makes 3-4 servings
 
+ 5-6 russet potatoes (cut to about 1/2" sticks)
+ 3-4 large cloves of garlic (finely minced)
+ 3/4 cup of flat leaf parsley (finely chopped)
+ 3 tablespoon of grated parmesan cheese
+ 1 tablespoon extra virgin olive oil
+ salt and pepper to taste
 
 
|how to|
 
{1} Preheat oven to 425 F.  Toss the cut potatoes in 1 tablespoon of olive oil, salt, and pepper.  Place fries in a single layer on a cookie sheet.
 
 
{2} Bake fries for 20 minutes. 
 
{3} Remove from oven and toss fries with the garlic, parsley, and parmesan cheese. 
 
 
{4} Increase oven temperature to 450 and bake for another 5-10 minutes or until fries are golden brown.
 
 
ENJOY!


Wednesday, November 5, 2014

DIY Pottery Barn Knockoff- Chalkboard Pennant

I always knew I wanted to incorporate a pennant banner of some sort in Baby Matthew's nursery.  While shopping at Pottery Barn Kids, we came across this adorable chalkboard pennant...


But the $29 price tag was not appealing at all.  Being the Domesticated Diva, I knew I could replicate this for just a couple of dollars.  Here's my knockoff version of it...


|what you will need|
 
+ chalkboard paint
 
+ chipboard pennant pieces (found at Hobby Lobby)
 
+ chalkboard marker
 
+ ribbon of your choice


|how to|
 
{1} Paint the chipboard pennant pieces with the chalkboard paint.  Apply two coats.  Allow the paint to dry an hour between coats.
 
 
{2} String your ribbon through the pennant banner.


{3} Write the saying or name of your choice on the pennant using the chalkboard marker.


Here is the pennant used during our couple maternity photo shoot...
 
photo courtesy of JCI Photography


Monday, October 20, 2014

Baby Matthew's Nursery Decor- Made in Texas String Art

Everyone that follows my blog knows that I absolutely love anything Texas related.  I had to incorporate a little bit of Texas in Baby Matty's nursery.  Here's what I came up with...


I've always wanted to experiment with string art, but never got a good reason to until now.
 
|what you will need|
 
+ string (I actually used acrylic crochet thread)
+ wire nails (#18 x 3/4 in.)
+ wood panel (I used a 12 x 12 panel)
+ acrylic paint
+ hammer
 
 
|how to|
 
{1} Paint your wood panel with the acrylic paint of your choice.  Do two coats of paint.  Ensure your paint dries at least 2 hours between coats.  Allow the panel to dry overnight after the second coat.
 
 
{2} Print out the image you plan on making your string art.  Tape it to the wood panel.
 
 
{3} Draw dots around the outline of the images or letters using a pen or pencil.  These dots are where the nails will be hammered onto the wood panel.
 
 
{4} Hammer in the nails to the wood panel.  This is the longest step in making your string art.  Leave at least a 1/4" of the nail protruding out.


{5} Remove the image outline and tape leaving the nails intact.
 
 
{6} Now the fun part!  Start by tying the string or thread around one of the nails.  Then zig-zag your thread through the nails until the image or letters is filled in with the thread.  After you fill in the letter or image tie the string or thread to a nail to secure it. 
 
 
Here's the final product...


Sunday, October 12, 2014

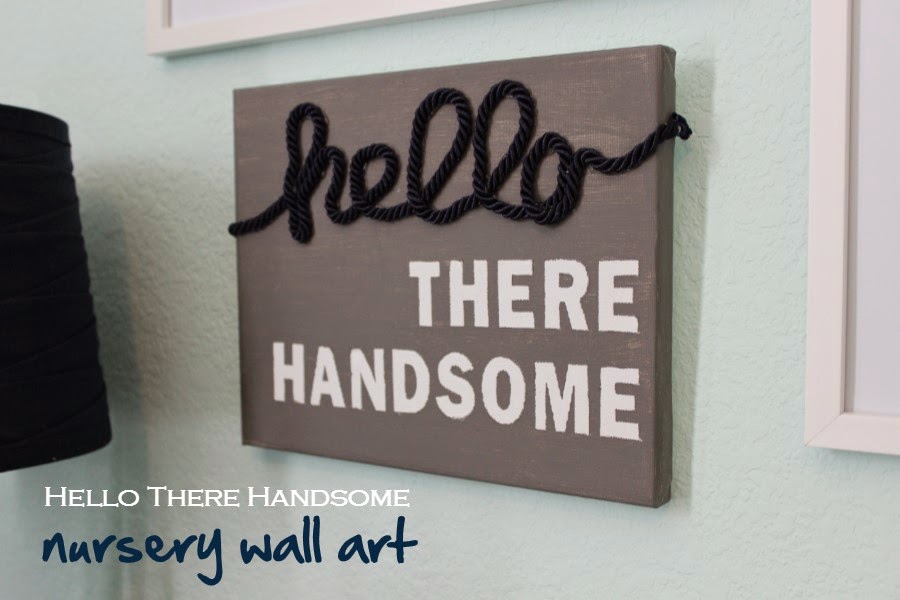
Baby Matthew's Nursery Decor- "Hello There Handsome" Wall Art

I have been super excited to start on Baby Matthew's nursery!  I had so many ideas floating in my head.  I wanted to do a picture collage above his changing table.  I saw a cute "Hello There Handsome" pillow at Home Goods.  I decide to recreate this saying as a wall art décor. 


|what you will need|
 
 
+ blank canvas (I used a 8 x 10 sized canvas)
+ alphabet letter stickers
+ craft paint
+ paint brush or sponge
+ decorative trim cord
+ hot glue gun


|how to|
 
 
{1} Stick your alphabet letter stickers to the canvas.  Press hard and make sure the stickers are lying flush to the canvas.


{2} Paint the entire canvas with craft paint.  I did two coats of paint.  Allow the paint to dry at least an hour between coats.


{3} Let the paint dry completely overnight.  Then, gently peel off the alphabet letter stickers.


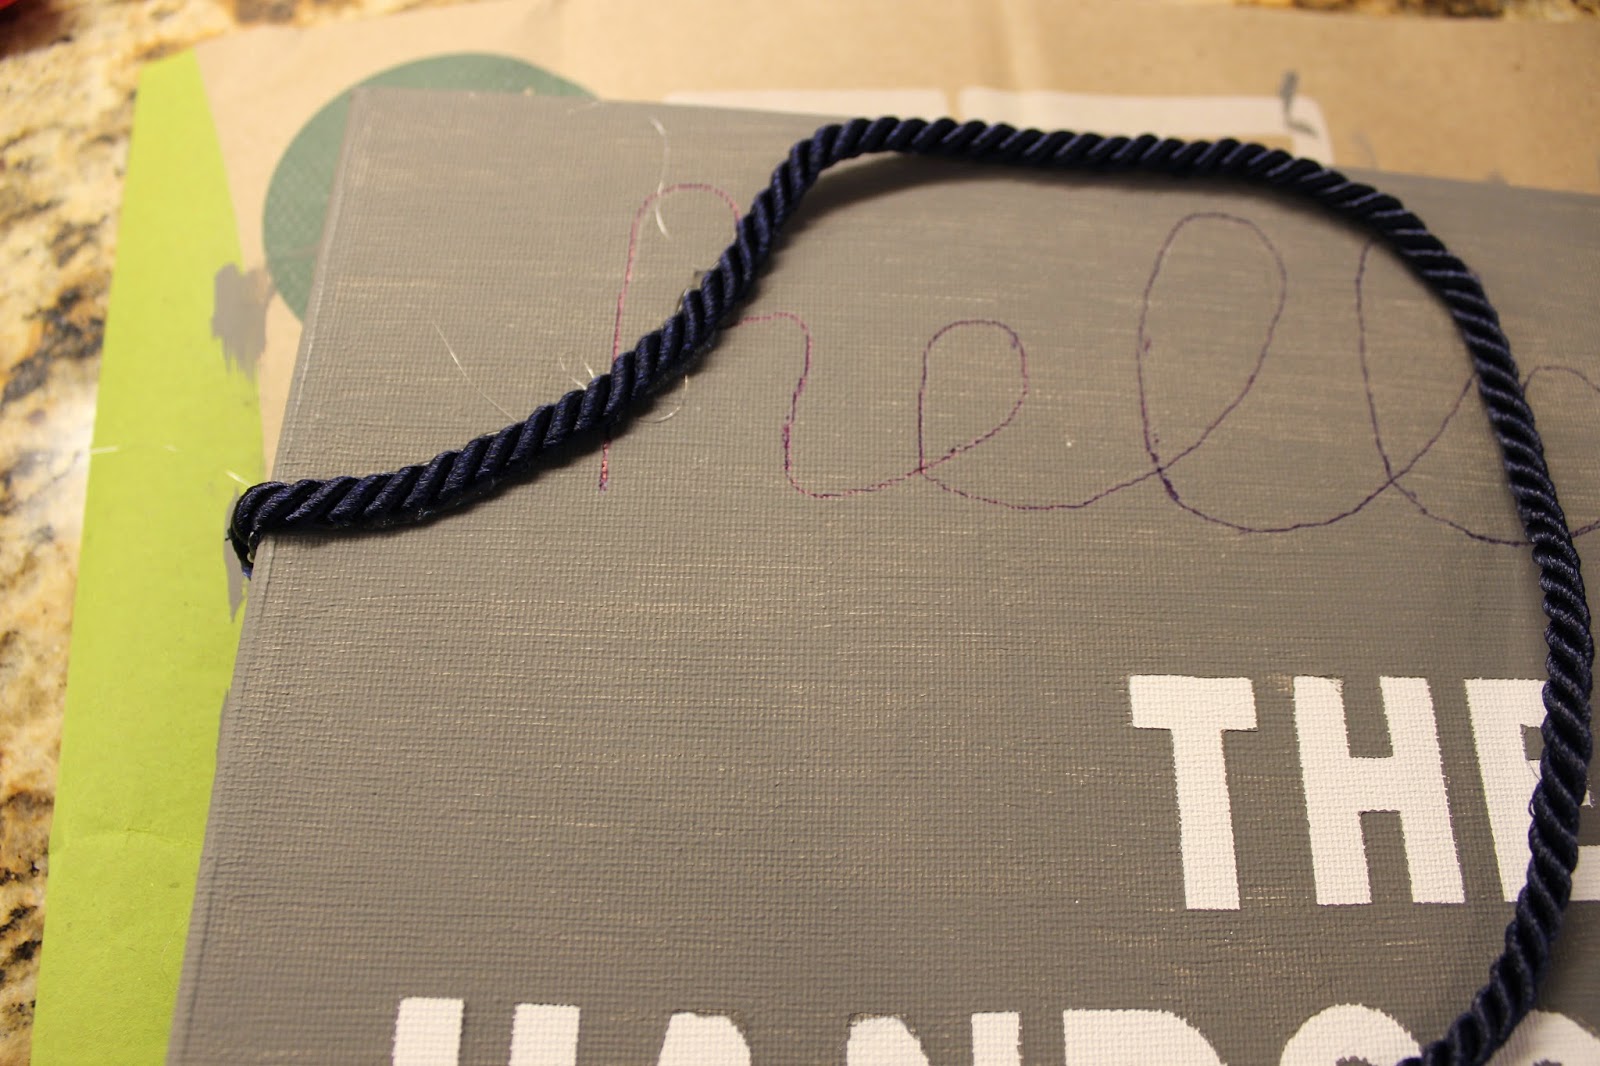
{4} Then I wrote "hello" in a simple cursive font on regular printer paper.  Place the wording where you want it on the canvas.


{5} With a sharp ball point pen, outline the font.  Make sure you apply a good amount of pressure so the ink goes through to the canvas.


{6} Using a hot glue gun, glue the decorative cord to the canvas following the cursive outline.


Here's the finished product...


Wednesday, September 3, 2014

Crispy Baked Chicken Wings (No Frying Needed!)

I love crispy chicken wings!  I found this genius way of getting a great crispy skin without all the oil and frying!


|what you will need|


(makes 2-3 servings)
+ 2.5-3 pounds of chicken wings
+ juice of one lemon
+ 3 large cloves of garlic
+ salt and pepper to taste
+ 4 tablespoons of extra virgin olive oil

|how to|

{1} Preheat oven to 400 degrees.

{2} Mince your garlic cloves.

{3} Place your chicken wings in a large mixing bowl. 

{4} Add the lemon juice, minced garlic, salt, pepper, and extra virgin olive oil to the chicken wings.  Mix well.


{5} Place the chicken wings in a aluminum baking sheet.

{6} Bake wings for 40 minutes until crispy and golden brown.

ENJOY!

Friday, July 11, 2014

Baby Strong's Pregnancy/Gender Announcement!!!

It has been a very long time since I've been active on DD!  Sorry I've neglected my fellow divas :(  A lot has happened since my last post.  One major change is...Mr. Domesticated Diva and I are proud to announce that we are expecting a bouncing BABY BOY this November!  We are super excited!  We decided to wait until we found out the sex of the baby (at 20 weeks) to make our big announcement.  There are so many great pregnancy and gender announcements floating on the web. 

Here are a few of my favorites...

{So doing this one when my "bump" gets bigger}
 
 
{Who doesn't love a cute chalkboard announcement!?!}
 
{Confetti or a piñata gender reveal is so fun!} 
 
{For those beer loving daddies out there...this is absolutely adorable}
 
{Silly String gender reveal is the funniest thing ever!}
 
 
|Here's Baby Strong's Pregnancy/Gender Announcement|


We love being original and thought a "movie poster" pregnancy/gender announcement was just that!  Of course we had to have Baby Strong's beautiful face front and center :) 
 
I created the announcement using Microsoft Publisher.  It really did not take too long to make, and we love the results.  We shared the picture with friends and family on Facebook and Instagram! 
 
I can't wait to share more baby related post with my fellow divas!  Thanks for all your support!


Thursday, January 30, 2014

Game Day Recipe: Grilled Pizza with Prosciutto + Arugula + Basil Pesto + Fresh Mozzarella

I am a huge fan of pizza.  It can come in the form of a calzone, deep dish, thin crust, you name it!  Mr. Domesticated Diva and I have made pizza before, but never have we thought about grilling it.  I mean, you can grill just about anything right?


|what you will need|


+ olive oil
+ grill (we have a propane grill)
+ store bought pizza crust dough (we used the Pillsbury Artisan Pizza Crust)
+ sauce (either pizza sauce, cream sauce, pesto sauce, etc...we used a pesto sauce)
+ toppings & cheese (we used Prosciutto, Arugula, and Fresh Mozzarella, but the possibilities are endless)

|how to|

{1} Heat grill to about 325 degrees (medium heat).

{2} Prepare your toppings (i.e. wash and cut veggies, cook meats, slice cheese, etc).  We found that having the toppings ready was helpful, especially since the pizza crust cooks very fast.

{3} Open the canister of pizza crust and roll it out.  We decided to cut the pizza in half since it would be easier to handle.  You can also leave it as is. 

{4} Oil each side of the pizza crust with a small amount of olive oil. Place the crusts on either a large cutting board or a cookie sheet.


{5} Place the crust directly on the grill.  Grill one side of the pizza until it is golden brown.  This took about 3-5 minutes.

{6} Once one side is grilled, flip the crust over to the other side.  Top the now grilled side crust with toppings and cheese.

{7} Close the grill and bake on medium low for about another 3-5 minutes.  Bon Appetite!


This is a easy, fast, and delicious way to cook (I mean) grill a pizza.  We can't wait to try other combinations of toppings! 

Thursday, January 16, 2014

Game Day Recipe...Duck Wraps

This is a perfect recipe for watching the game.  Now these are not ordinary duck wraps, these are bacon wrapped duck breast marinated in Italian dressing and stuffed with jalapenos and cream cheese.  Drool!  My brother-in-law made these for us over the Christmas Holiday, and they were gobbled up in a second. 


|what you will need|

-makes about 3 dozen-

+ can of sliced jalapenos
+ package of cream cheese (softened)
+ 2 packages of bacon
+ duck breast (we used 8 duck breast that was marinated in Italian Dressing)
+toothpicks


|how to|
 
{1} Cut the duck breast into 1 1/4" cubes, cut the bacon slices in half, and cut the cream cheese into 1/2" cubes.


|duck breast...yum|
 
{2} Place half a slice of bacon on the cutting board and put a piece of duck breast in the middle, along with a small cube of cream cheese, and a slice of jalapeno.  Press down the cream cheese slightly to distribute it along the duck piece.


{3} Wrap the bacon around the duck + jalapeno + cream cheese goodness.  Then secure the bacon together with a toothpick.


{4} Grill the wraps on high for about 10-12 minutes or until bacon is cooked.  Make sure to turn the wraps half way through.